With the Chinese malware gradually dying down this year and music beginning to enter back into my life, I’ve been trying to figure out how to get back into the local scene and have some fun with new musical endeavors. Part of that has been focusing on electronic music over the past year with my project, ReLiC. I’ve had a lot of fun learning how to sequence music with older technology such as the Macintosh SE I picked up earlier this year. My first instinct was to haul that puppy over to the local music hall along with as many keyboards as I could manage, hook it all up in less than a minute, and relish in the look on everyone’s faces as my 16-bit monster springs into life… My second thought was that that didn’t sound like the greatest idea.
I still want to incorporate live synths and sequencing, but in order to get the full effect of my music, I’d need to compromise and introduce just a wee bit of backing tracks into the mix. One could easily haul in a laptop and an audio interface and load up Reaper, but there are a lot of uncertainties when using a traditional device in a live performance scenario (anyone ever heard of Windows Update?). Plus, I always get a bit turned off when I see a DJ up there with their laptop. Seems like the life is getting sucked out of the music.


…So why not build my own laptop thing, but better!
My idea was simple, use a small SBC, some clean audio outputs, and midi input/output to put together a dependable one-trick pony!
I’m guessing you’ve probably already heard of the Raspberry Pi, so I won’t go into detail there. I will say that I’m using the Model A+ variant which gives this device a more slender form since all we need is one USB port, after all.
You could easily run audio out through the headphone jack built-in with the Pi, but I’m not sure how well the grounding and quality on that will play with front-of-house speakers. I chose to use the HiFiBerry DAC+ which I already had lying around. The RCA jacks would definitely be better as 1/4″ or XLR connectors, but that’s nothing that a few adapter cables can’t fix.
I’m handling MIDI over the RPi’s GPIO Serial connection using a custom board I diy’d together. It actually works really great and was a fairly simple project. The schematic for this is provided by Dr. Scott M. Baker and should be universal for most midi applications. I originally planned on using a USB midi cable, but that thing was an immediate bust. Going with the GPIO option ends up simplifying the final design, and from what I can tell, is extremely dependable.
In the end, the hardware was an easy proposition. Unfortunately, getting the darn thing doing what I wanted it to do wasn’t so easy…
It’s all in the software
It would be great if there was something like aplay or aplaymidi that smashed the two together to synchronize Audio and Midi files… but there isn’t that I know of without loading up an unwieldy DAW (please contact me if you know otherwise). Though it might not be the best option for performance, I wrote the entire program in Python using a handful of libraries that fit the bill.
The program flow is simple:
- Read the local and user config files for settings (also a few command line options available)
- Initialize the desired audio and midi devices (serial midi over the RPi’s GPIO port is supported and encouraged)
- Search the specified folders for any audio (.wav) and midi (.mid) files. Group them together by filename (can have both audio+midi or just one or the other) and sort them alphabetically.
- There’s specific logic in there to mount and search an external drive (ie: USB thumb drive). This is the ideal way to load up files.
- When a MIDI note is received (or a keyboard number pressed) that is within the range of files collected (1-based indexing):
- Load up the audio and midi files (depending on what’s available)
- Initialize the audio device to use the specified channels/samplerate
- Begin playback of audio (by loading in buffer periods) and midi messages (based on timestamps)
- The MIDI note/keyboard number of
0is reserved as a panic button to stop playback.
So, all I’ll need now for my life performances is this little box and a small midi controller (I’ll be using the Akai MPX8, though that’s not my best recommendation) with the pads configured for the notes 1-7 (the last one can be 0 as a stop button), and I’m good to go! Much better than hauling out the Macintosh! 😛
Fyi: I’ve actually had this idea for a long time now (over 4 years, I believe) when I wanted to do something similar for my old band, Crystal Coast. I ended up building upon the same code base to get to where it is now. A good portion of it got scrapped, but there’s still some of that 4-year-old code sticking around. Kinda exciting if you think about it!
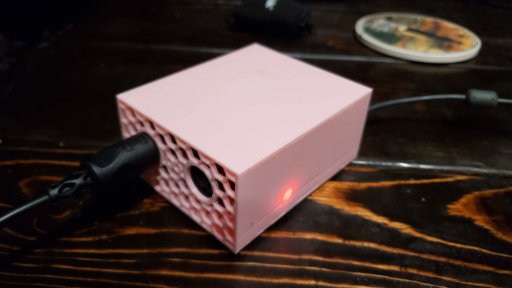
Every good project needs a cute 3d-printed case…
The case I used is a modified version of this really cool one I found on Thingiverse created by Sean Smith. It was actually the only option I could find for the RPi Model A format with the HiFiBerry, but it was kinda perfect out of the gate. Instead of the provided HiFiBerry Digi+ sled, I found this DAC+ sled created by Ape Monkey for the same case that fit like a glove.
I’d normally provide the files for this, but I designed it specifically for the MIDI board I threw together. If you create something similar, it’d probably have a different size/shape to it. If I ever come across something like the OSA MIDI Board, I might update the design for that particular hat.
Note: I’d show off some videos of this bad boy running, but I did run into a situation that I haven’t yet resolved. I originally intended to use a Raspberry Pi 1 Model A+ that I had lying around, but with it’s measly single-core 700 MHz processor, it can’t handle the multi-threading required to run midi, audio, and input at the same time. The sound and midi notes end up coming out choppy. With further optimization and probably switching to a different programming language entirely, I could definitely get this program running fluently on a RPi 1… but ain’t nobody got time for that. Instead, I ordered up a Raspberry Pi 3 Model A+ which should be up to the task with all 4 cores screaming at 1.4Ghz. That’s like 8 times better, right? Plus, I don’t think they even make the RPi 1 anymore, so It’s better to focus on the current platform. Once I get that in and work out any other kinks, I’ll try my hand at demonstrating it… maybe even put together a full video??