A Need Arises
For some time now, I’ve been using a pretty decent consumer component switcher, the Psyclone PSC01. For a consumer-grade, powered switcher, it really isn’t bad at it’s job. The ability to have a single source for ethernet and optical signals is fantastic too, a powerhouse for sixth and seventh generation consoles.
The sad thing is, it only handles 4 sets of inputs. Being the collector that I am, I have many more than that, around 10-12, all with different signal formats. To resolve this, I’ve been using a handful of cheap mechanical switchers along with my audio receiver’s own switching capability to get all of these devices eventually down to the same set of outputs. In the end, it was not a pretty thing too look at or deal with, and it required a comprehensive understanding of the whole environment just to get the console you wanted working (something my girlfriend was not a fan of).
Deciding on a Switcher
In order to fix the situation, I was left with two choices: get my hands on a couple more PSC01s and find a way to stack them together or finally order up one of the professional-grade video matrix switchers. I went with the later.
I had seen matrix switchers covered by My Life in Gaming and had heard them mentioned by other sources many times before, but only one name and model tends to come up, the Extron Crosspoint. These beasts are definitely something to admire, classic design, chunky buttons, huge arrays of inputs and outputs and the works, but because of their rising popularity, finding one online for a good price with all of the features you need (especially audio support) is a nightmare. After a couple of weeks of digging around and researching, I found a series of matrix switchers by a company called FSR and a good deal on one that fit my requirements perfectly. After reading thoroughly through its manual, I was pretty confident that this device would be awesome. I stuck with my gut and bid on the unit, luckily winning it without much competition. Given a week or so (and a few FedEx mishaps D:<), it finally arrived in town at a hefty weight.
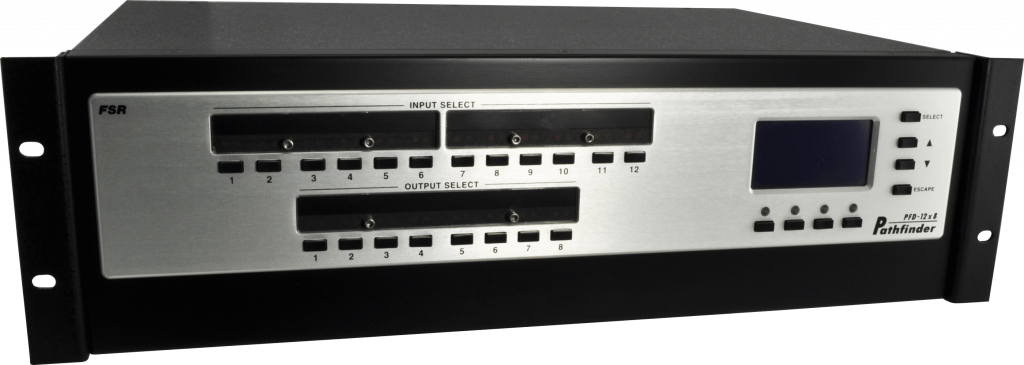
Pathfinder Features
The FSR Pathfinder is very similar to the Extron Crosspoint in many ways, but it has some functional bonuses that I’m a big fan of. First and foremost, it has a built-in LCD for easy configuration and preset allocation. I was able to set everything up without flipping through the manual at all when I first started playing with it. The configurable audio levels are very useful especially for noisier consoles, such as the Atari 2600.
On an Extron, it’s up to you to decide how video signals are routed, but the Pathfinder lets you specify exactly what is on each input and output to help prevent crossing over signals using its video split functionality. This probably helps it treat the signal properly too by knowing what to expect there, but I’m not exactly sure on this.
Here’s a list of everything to note:
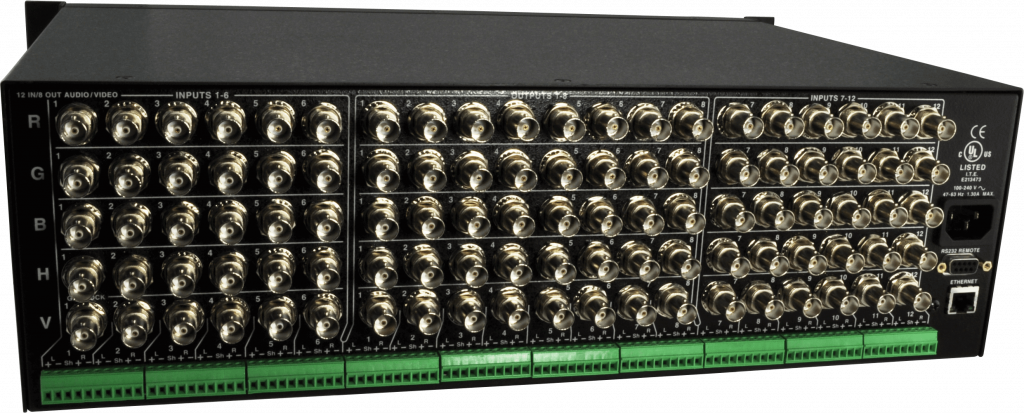
- All BNC and Pheonix connectors
- 12 multi-split video/audio inputs
- 8 multi-split video/audio outputs
- HD bandwidth compatible (up to 1080p/2k)
- Unbalanced & balanced stereo audio (with pheonix connectors)
- Per-input/output configurable audio trim/level
- Per-input/output configurable video split; switch between RGBHV, Component, S-Video & Composite, and 3x Composite
- Per-input/output configurable RGB Delay (for use with very long cable routing)
- 128 preset slots (though I wish you could name them)
- 3u rackmount size
- RS-232 serial and ethernet IP remote control
Inevitable Teardown
Being the person that I am, the first thing that I did was open her up and see how it all works inside. One thing this revealed was a hidden genlock input on the inside. I probably won’t use this, but it’s good to know that it exists! Though there are a few scuffs on the exterior faceplate, the interior itself is in impeccable condition.
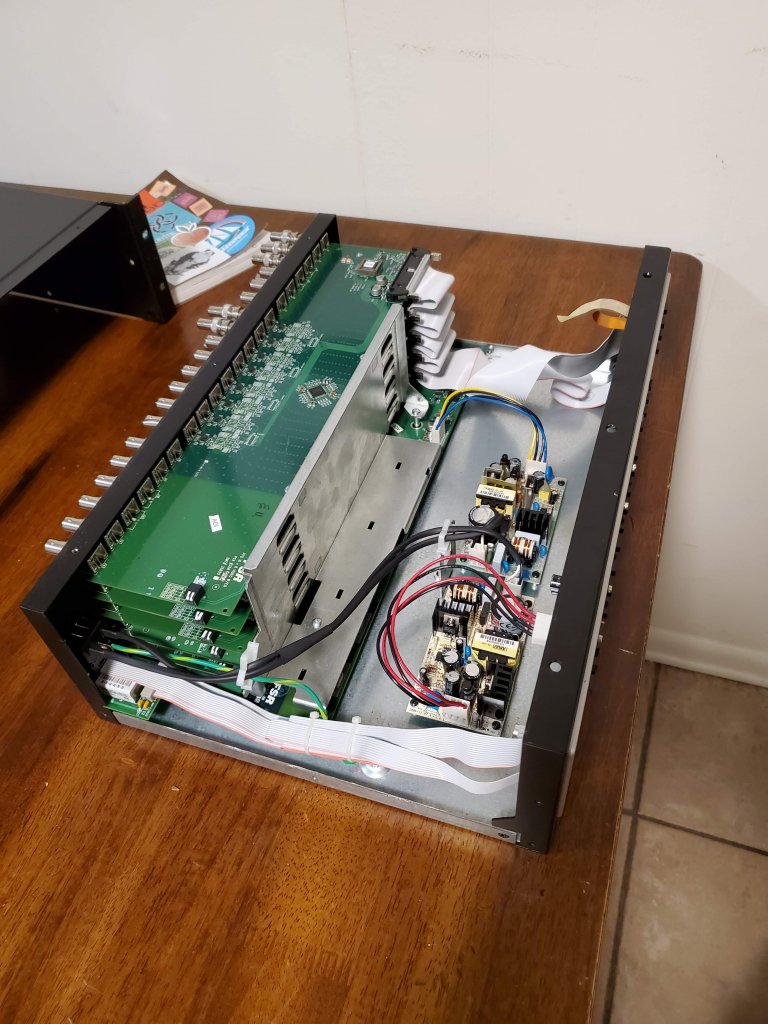
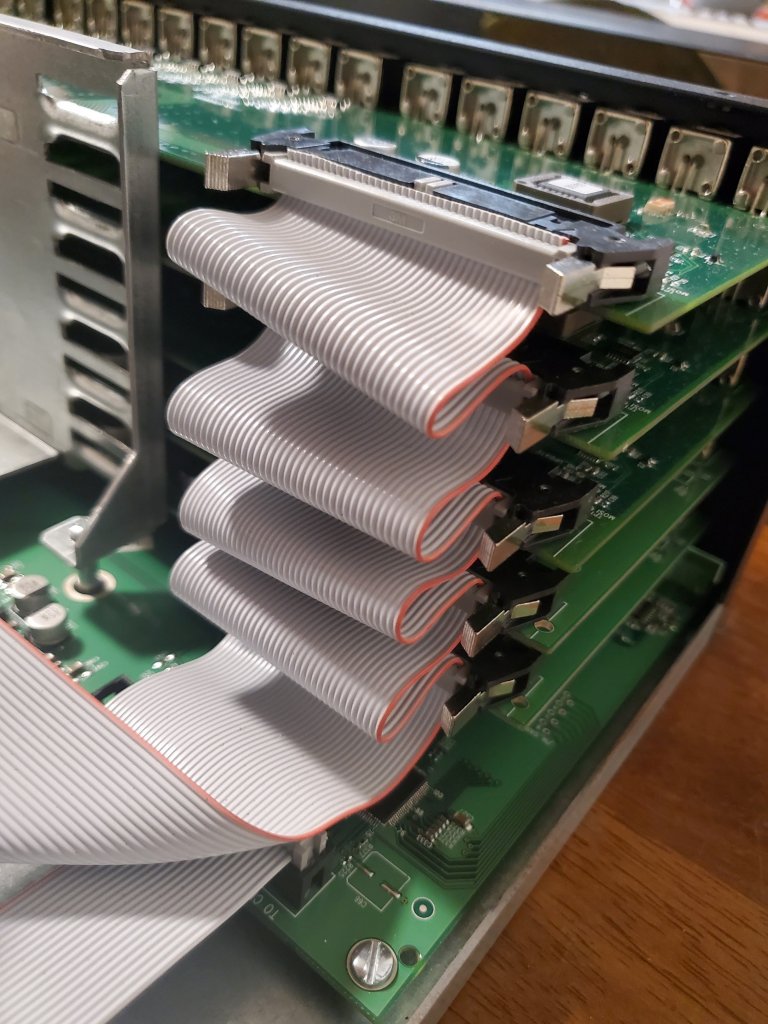
One heck of a ribbon cable. 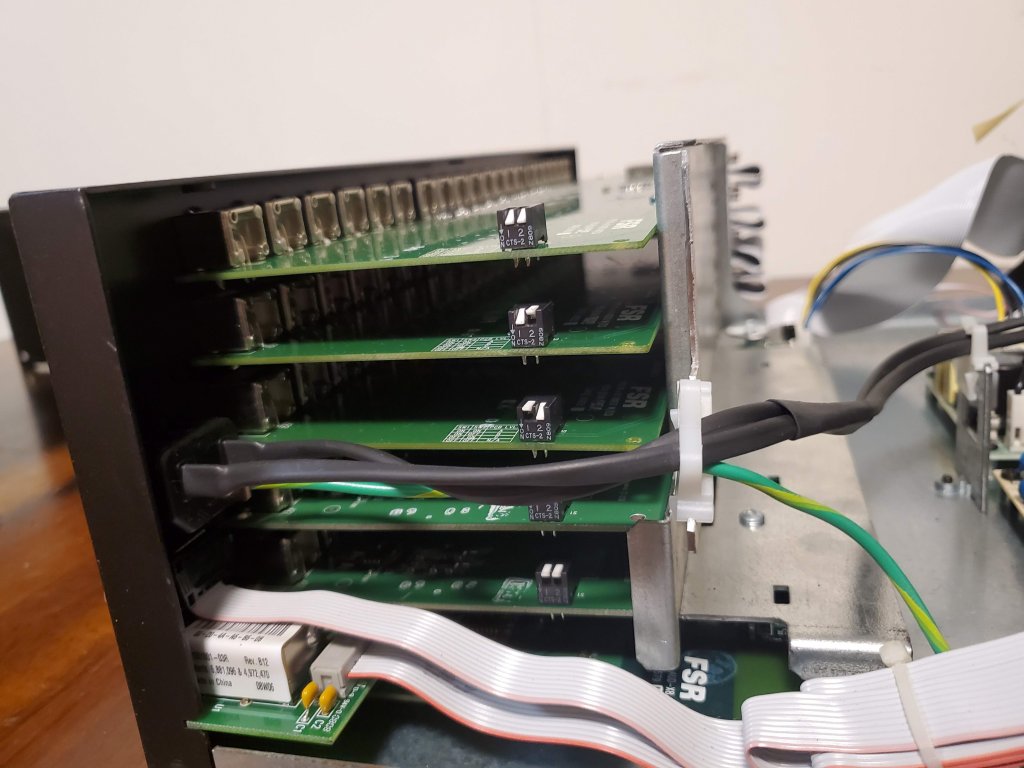
Toggle index switches for each board. 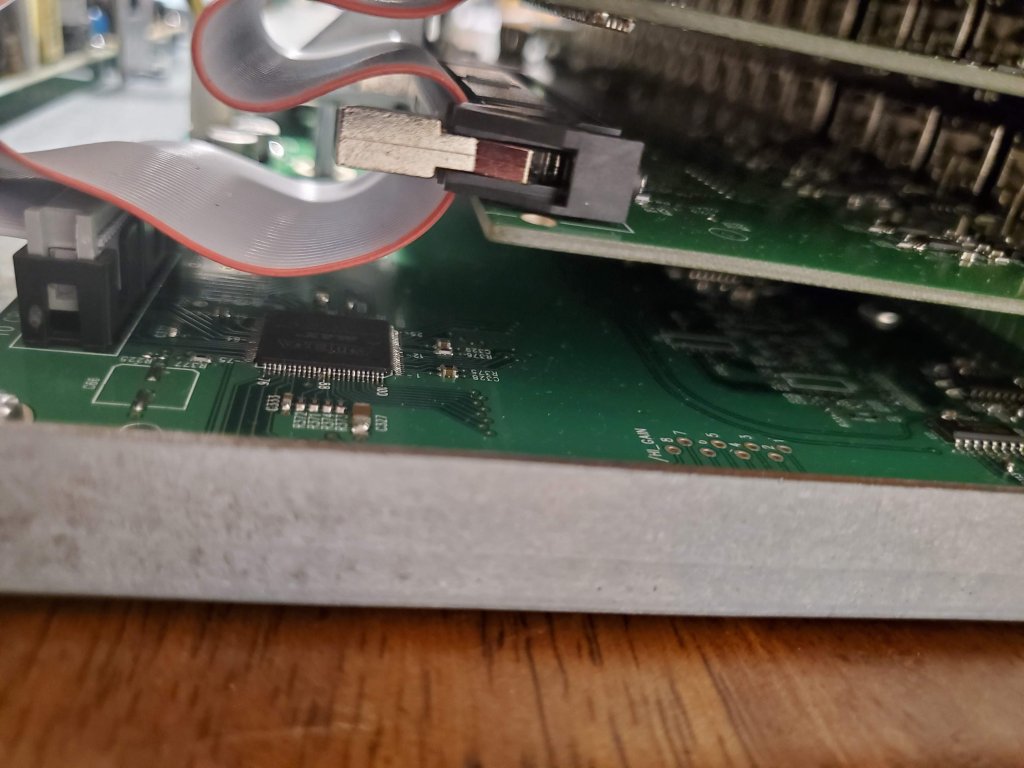
There are a couple of FPGAs on board to handle switching. 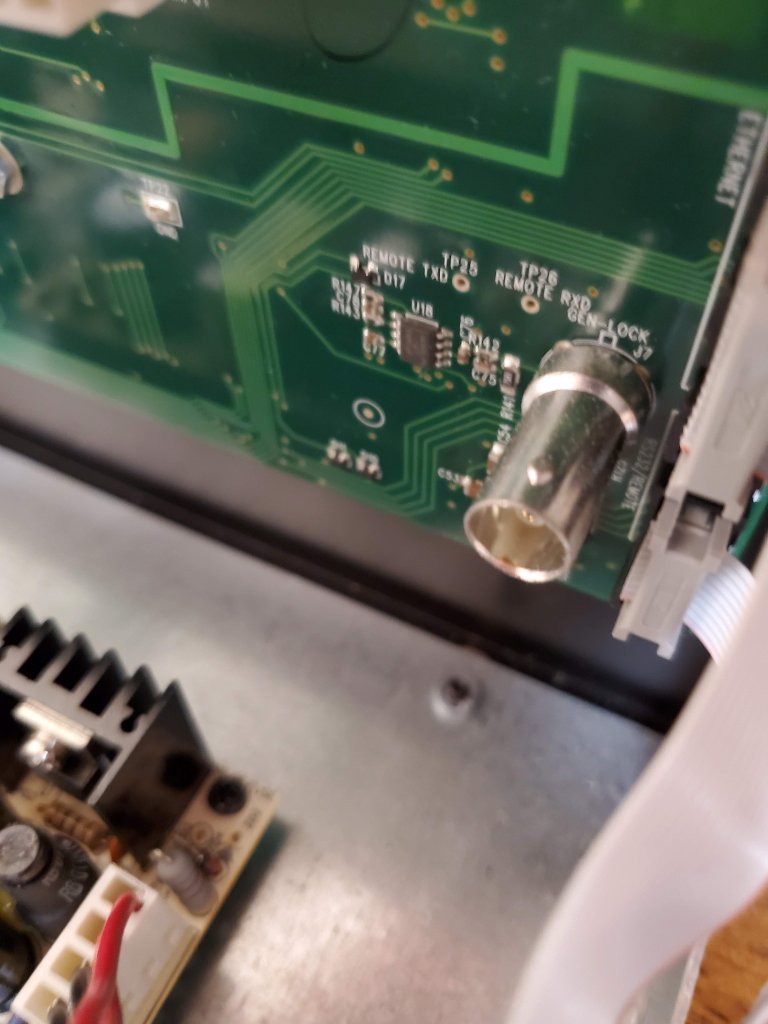
Internal Genlock connector. 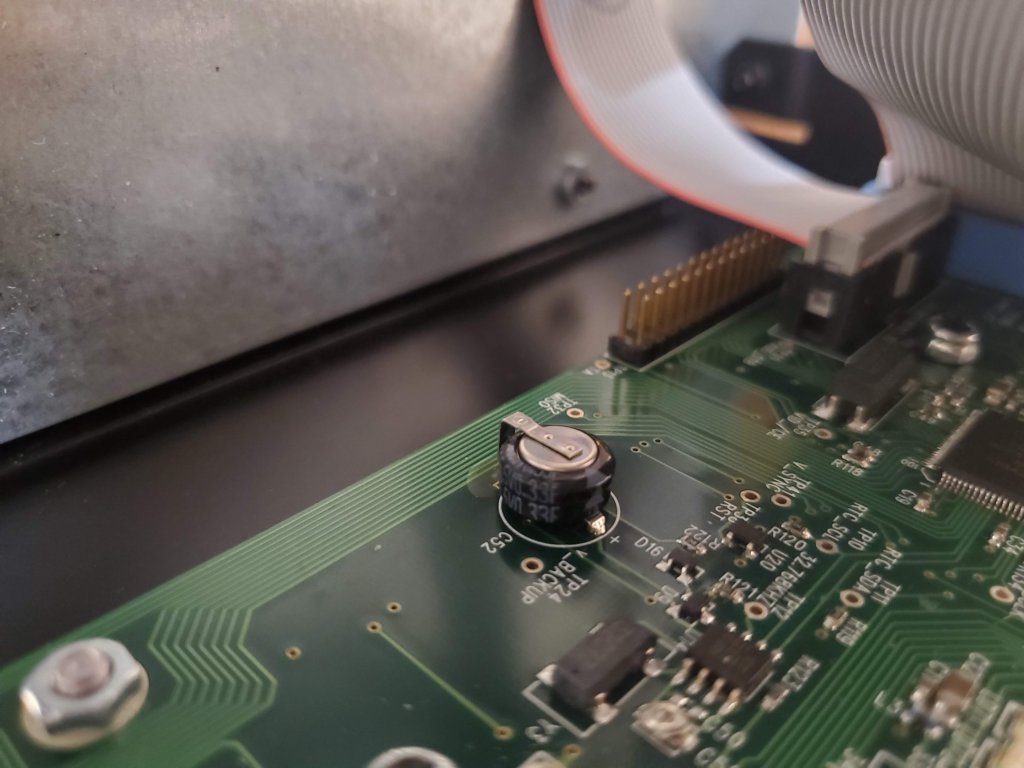
Backup Battery/Capacitor. No leaks here!
Fitting It In
One thing to note about the Pathfinder and other professional grade audio/video equipment (include the Extron Crosspoint) is that they are often meant to be rackmounted, explaining the big ole rack ears on the sides. You can definitely use them without installing them this way, but I’d recommend going ahead and building a cozy spot for your precious pro gear.
You can buy pre-built rackmount cases online for a hefty price or find a decent used rig on your local marketplace, but I find that just building your own is easy enough. That’s what I decided to do here so that it would fit in with my TV console seamlessly.
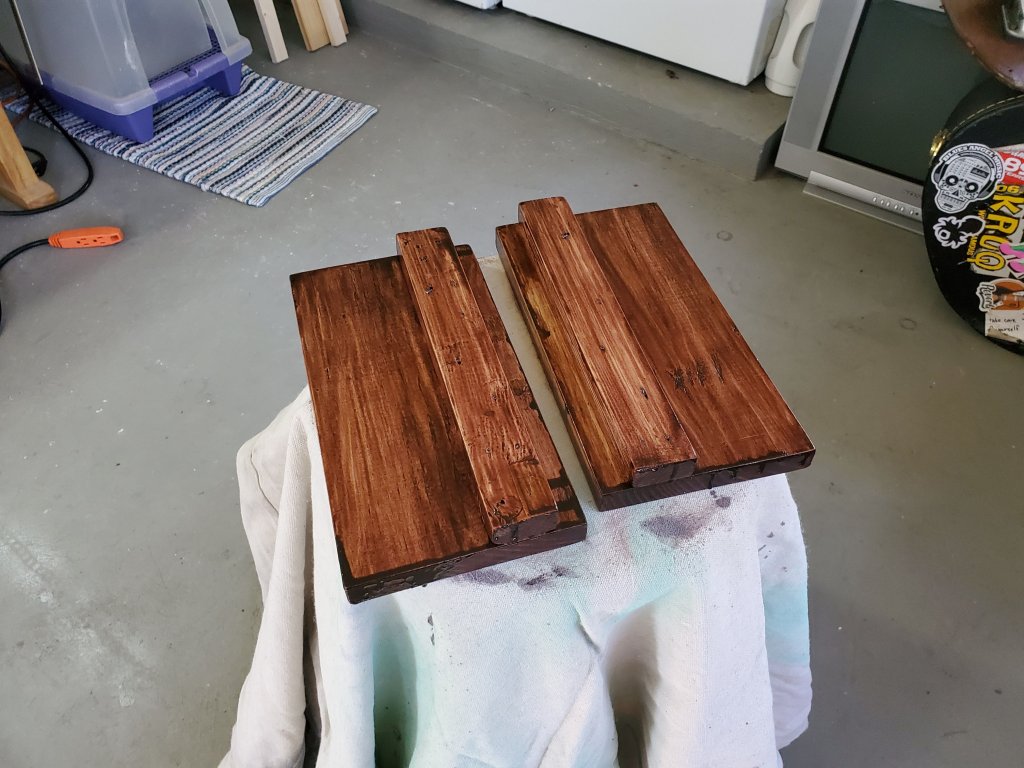
Mind the awful staining job. 
I forgot to clean it up before drying. 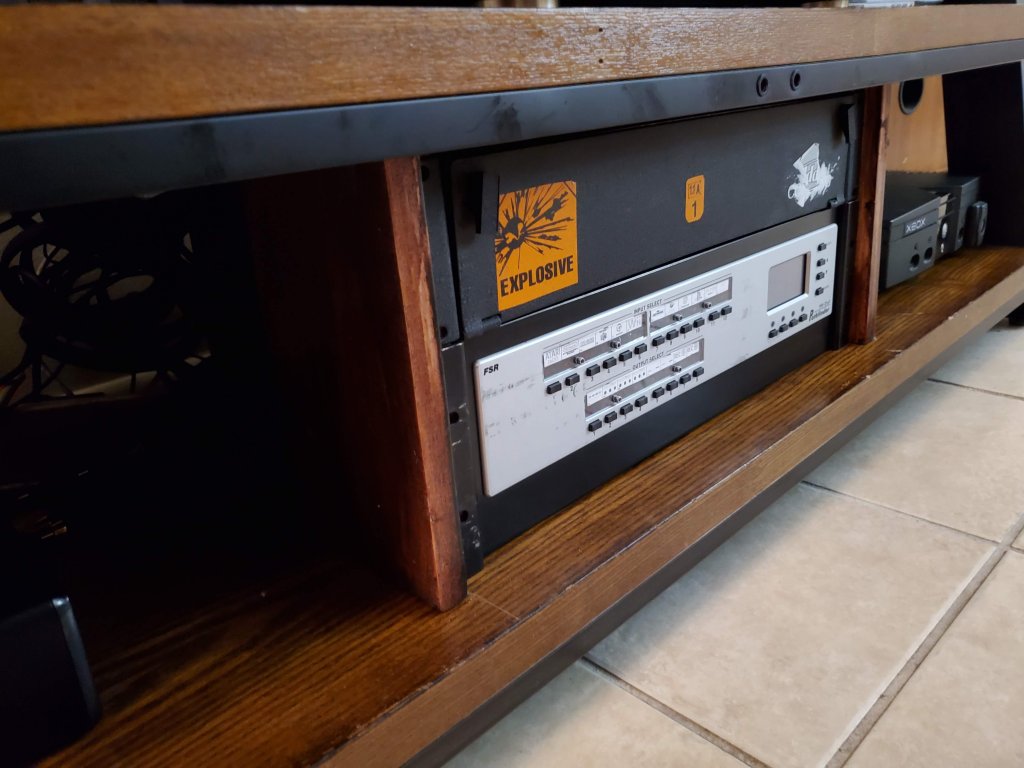
Screws soon to come…
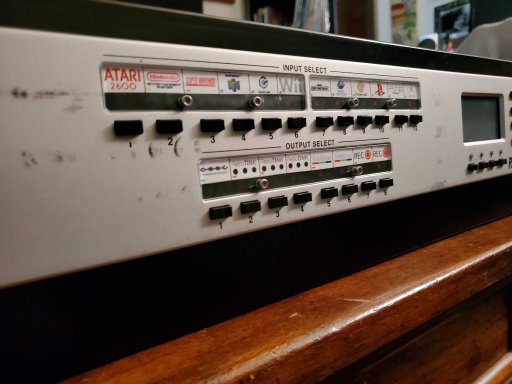
Routing and Labeling
Similar to the Extron, the Pathfinder provides an area to add your own labels. If you do have an Extron, RetroRGB has a good tutorial on making labels for that unit. After some quick measurements and deciding how I was going to lay out all of my consoles, this is what I was able to whip up. As long as you have a good printer that can handle some of the smaller details, this should work for you. Feel free to download the PDF and modify it to fit your needs if you also have one of these units. I recommend using Inkscape or Illustrator to edit the document.
I must admit that some of the component outputs I have detailed are in my ideal situation. I do have HD Retrovision cables for a good number of my consoles, but I am still waiting on them to release their Dreamcast component cable. Also, I am planning on snagging up a Carby component cable for the Gamecube at some point which already has BNC connectors for this kind of setup. If you can’t already tell, I really like the component format. 😛
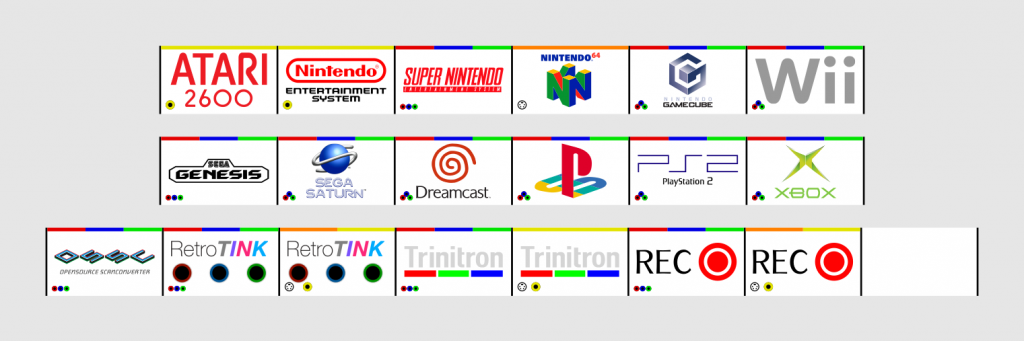
Input/Output Routing Table
This is how I (will) have my Pathfinder routed up. This of course probably won’t apply to you, but it should at least give you a good idea of how you can utilize each channel. I’m honestly surprised that I will be working with most all of the I/O right out of the gate, but I might end up leaving some of these unused for a while. They do of course make units with more inputs and outputs, but they get much bigger in size very quickly.
Another thing to note is that you’ll probably need to get BNC to RCA adapters for each input. Luckily, you can find relatively decent adapters in bulk easily. I bought about 40 off of Ebay to get things started.
| # | Inputs | # | Outputs | ||
|---|---|---|---|---|---|
| 1 | Atari 2600 | Composite | 1 | OSSC | Component |
| 2 | NES | Composite | 2 | RetroTINK-2X | Component |
| 3 | SNES | Component | 3 | RetroTINK-2X | S-Video/Composite |
| 4 | N64 | S-Video | 4 | Sony Trinitron CRT | Component |
| 5 | Gamecube | Component | 5 | Sony Trinitron CRT | Composite |
| 6 | Wii | Component | 6 | Video Capture Device | Component |
| 7 | Genesis | Component | 7 | Video Capture Device | S-Video/Composite |
| 8 | Saturn | Component | 8 | Unused | |
| 9 | Dreamcast | Component | |||
| 10 | PS One | Component | |||
| 11 | PlayStation 2 | Component | |||
| 12 | Xbox | Component |
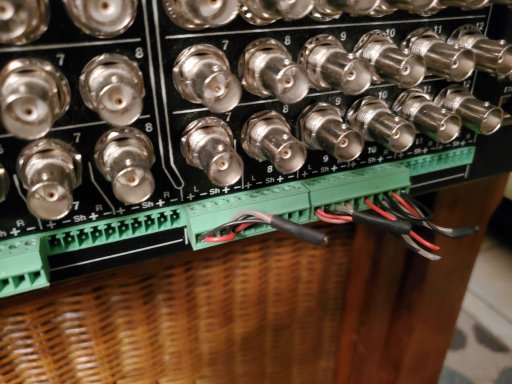
Phoenix Audio Connectors
The only drag with the FSR Pathfinder is that it uses phoenix audio connectors just like the Extron units. I understand why this is done so that you can configure your audio inputs however you’d like, but it definitely doesn’t make my life any easier. I have all of the parts to build out my own adapters following the manual’s diagrams, but there are a couple of choices out there in case you’d like something more legitimate.
Connector Alternatives
db Electronics designed a pcb adapter that just screws right in to the terminals to give you your typical stereo RCA jacks. You can either get these printed out yourself and put them together or get some pre-built ones from Retro Gaming Cables in the UK.
These will work great on an Extron Crosspoint, but because the FSR Pathfinder is more compact vertically, there isn’t as much room above the audio connectors. I’d maybe recommend something along these lines instead using a 3.5mm phono jack. You’d still have to get adapters to go from phono to RCA, but those are readily available from many retailers.
Wiring Diagrams
The audio input and output wiring isn’t too difficult, but it’s very important that you follow the correct diagram. There are distinct wiring differences between balanced and unbalanced signals and input and output connections. For most gaming situations, you should only have to worry about unbalanced signals. I’ve highlighted the diagrams from the manuals which demonstrate this. I’ll being using stereo inputs and outputs for nearly all of my consoles with two exceptions, the Atari 2600 and NES. Both of these consoles only support mono outputs, so it’s best to go ahead and set up the appropriate wiring for them.
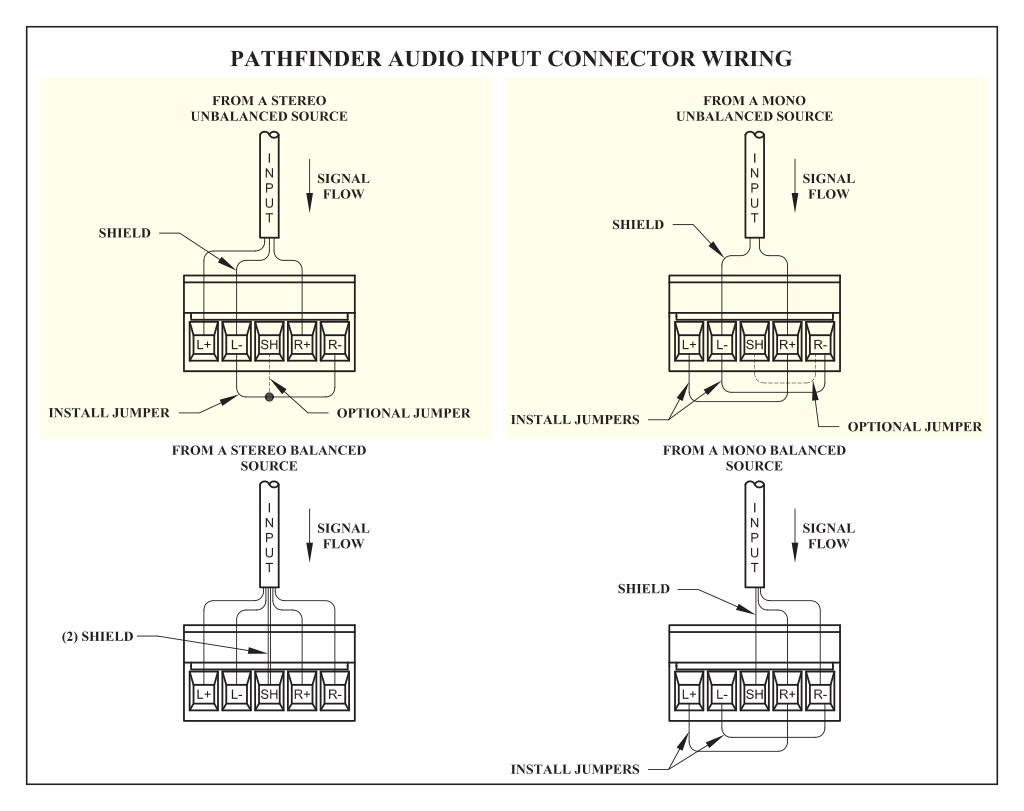

Diagrams from FSR Manual
Making the Connectors
This is definitely the part that’s going to be the most time-consuming. Soldering up and testing all of those RCA connections takes some time. But once you get a system going, it can be done in only a few hours.
One thing I realized halfway through is that the stereo unbalanced input and output diagrams are exactly the same. I had been labeling each this whole time when it wasn’t really necessary.
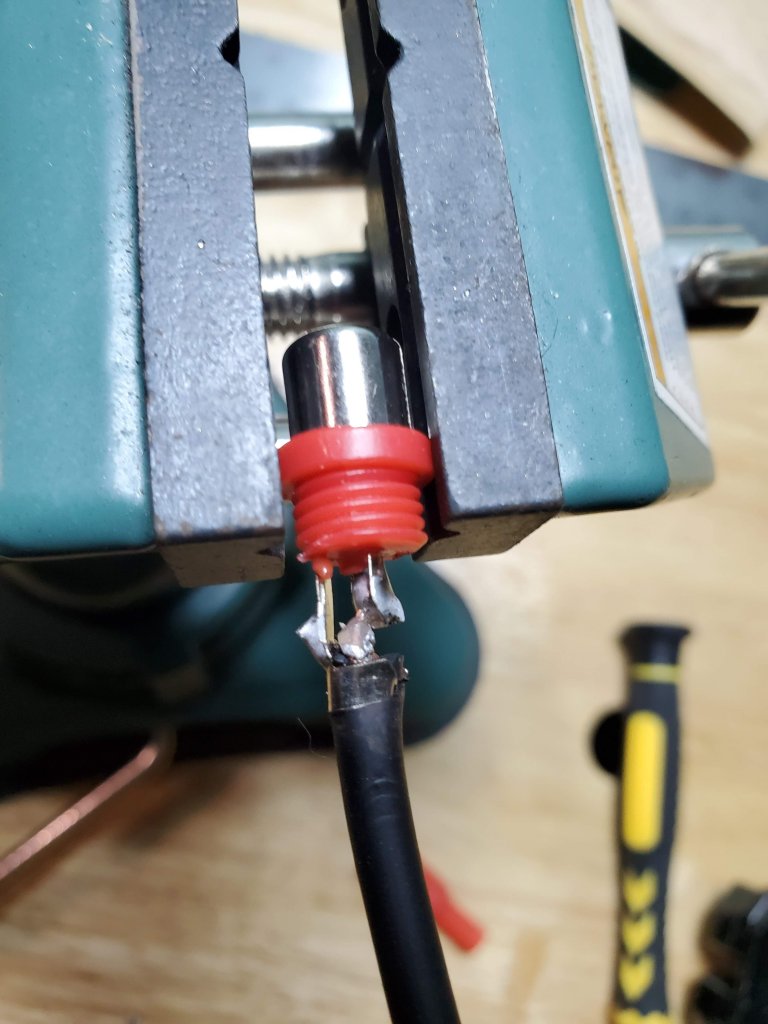
Double check each jack to make sure that you’re not bridging your signal and ground wires. 
Set of Mono Inputs 
All done!
To Sum Things Up
I just started using the matrix switcher in my living room with a couple of systems but haven’t connected everything yet. So far I am very impressed.
This unit is definitely not for the faint of heart; you’ve got to be committed to working with all of the different types of connectors, also bringing up the cost. All in all, I think I spent less than a hundred on this setup, which is well worth it in my books. These matrix switchers have limitless potential when it comes to how you’d like to run things. Though they require a lot of upfront setup, once it’s in place a matrix switcher makes the need to reach behind the console to plug things in and out almost nonexistent.
I’m still not sure why it and other matrix switchers other than the Extrons haven’t received any coverage on the usual retro gaming channels yet. Hopefully that will change at some point so that it’ll open up more options for enthusiasts.
Very good job writing them in this blog post
Best regards,
Mead Duke